Tuesday, February 17, 2015

Flipping Pancake Game

I just love this simple Flipping Pancake Game. Not only will it develop your child's physical skills but possibly their competitive side too :-)


Who can play?
Children aged 2 years and above, however as with all activities it depends on their age and stage of development.

What you need:
Playdough
Rolling pin
Small pan
Open space

How to play:
Make some pancake shapes out of playdough by asking your child to roll a ball and then by using a rolling pin, flatten it out into a circular shape.
Next you have to place your pancake in a small pan. We used our pans from Bee's kitchen play set.


Once you have your pancake and pan, practice tossing it up in the air and catching it back in the pan.

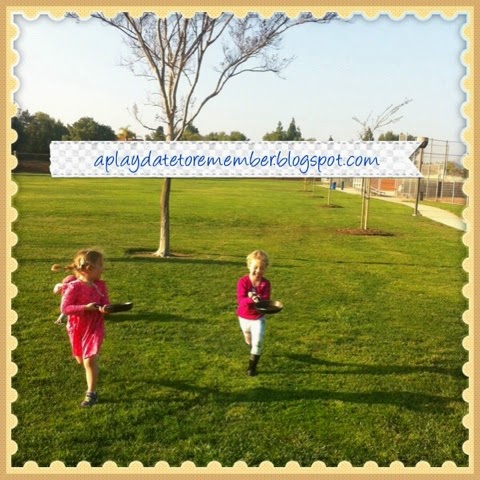
When your child feels ready, have a race with you or a friend to a certain focal point and ask them to flip their pancake whilst running. If they drop their pancake they have to stop and pick it up.
We had so much fun with this game and  had a little bit of cheating along the way.


Potential learning outcomes:
Physical:  Throwing and catching the pancake in the pan. running and hand eye coordination. Fine manipulative skills when rolling the playdough out and making it flat.
Mathematical: Counting how many times you can flip a pancake without dropping it onto the floor. Developing concepts of the shape of a circle.
Communication and Language: Listening to and following instructions. Talking about what is happening.
Literacy: developing those fine manipulative skills that are needed for holding a pencil whilst rolling the dough. Look at books about pancake day.
Art and Design: Using their imagination and creativity when making the pancake and role play.
Social and Emotional: Joining in with a game and cooperating. Following the rules of the game. Fun and enjoyment.
Knowledge of the World: Learning about the festival that is Pancake Day/shrove Tuesday. Being in their local environment.

Possible next steps:
Why not open a pretend pancake cafe to develop role play. Mathematic concepts could be introduced such as counting out the pancakes and using money. 

Tuesday, February 10, 2015

Cupids Arrows Game

Valentines Day is as good as any to sneak a bit of maths in to your child's day. This time, it comes in the form of a game that involves Cupids arrows. The game was really simple to make and we had lots of fun playing at the park with a friend. 


Who can play?
Children aged 3 years and above. All activities depend on your child's age and stage of development.

Safety:
Talk to your child about aiming the arrow towards the floor rather than heads/eyes as this could cause an injury

What do you need?

  • Straws
  • Card/Foam
  • Scissors
  • Cello tape
  • Chalk
What do you need to do?
Fist we need to make the arrows. They are really simple to do. Firstly you need to make a small slit in the end of the straw. Next, cut out a feather shape from either a piece of card or foam and slot it through the slit you made in the straw.


Finally add an arrow head to the tip of the straw. For this Just cut out a heart from a piece of card (making sure that the point is slightly curved so it will not poke anyone) Next, cello tape it to the other end of the straw. We made four arrows for our game.          


How to play the Cupids Arrow game:

To set up the game, we drew a heart on the ground with a piece of chalk.

Taking it in turns we threw our arrows into the heart (be aware of the way the wind is blowing... We had to draw another heart, going in a different direction as our arrows were getting blown the other way in the wind and the children were getting frustrated) 
Bee and her friend loves throwing the arrows and showed pride and excitement when they got one in the heart.


Once all the arrows were thrown, we counted how many went inside the heart and how many were outside.
To record our findings we made a tally on the floor with chalk. The children recorded how many arrows went into the heart by making lines on the tally. At the end of the game, the children can count how many arrows went into the target, compare who got the most in and least.


This helped us with understanding number bonds to 4 , encouraged mark making skills and promoted knowledge of how to recording information.  

We had so much fun and have a feeling that this game will be played well after Valentines Day.

Learning outcomes:
Communication and Language- Listening to instructions. Talking about what has happened
Literacy- Recording information with chalk. Developing their writing skills.
Mathematics- Developing an awareness of numbers, addition and tally making.
Art and Design- Creating our own game
Personal, Social and Emotional- Cooperation and turn taking. Fun and enjoyment. Pride when they manage to get an arrow in the hula hoop.
Knowledge and Understanding- Learning about Valentines day traditions. Talk about how arrows were used for fishing and hunting.
Physical- Large manipulative skills when aiming and throwing the arrow. Hand eye coordination.

What could be done next?

  • Substitute the heart with a hula hoop or a bucket for younger children, who have difficulty with their aiming and throwing skills.
  •  Draw a heart inside a heart and mark it with a number two. Taking the counting and adding one step further.
  • For children who are confident with numbers ask them to write the numbers instead of lines to represent each arrow. 
  • If your child does not enjoy the number side of this game. Just have fun throwing the arrow at the target and introduce it another time.

'You blow me away' Valentines gifts

Today I received a letter from Bee's preschool asking her to bring in 16 Valentines cards/gifts for her friends. My first thought was "Oh no... do we have the time and what are we going to do?" After a quick rummage in the garage, I came across some bubbles, that were left over from Bee's birthday party... just enough for her school friends. We then set about transforming them into a cute Valentines offering.


Who can play?
Children aged 2 years and up will love sticking the love hearts on the bottle and mark making/writing their name on the card. Supervision is needed at all times.

Safety
When younger children are handling the bottle of bubbles, ensure that they do not drink the liquid. Please see warning sign on the bubble bottles.

What do you need?
  • Small bottles of bubble solution. (I picked mine up from the dollar/pound store)
  • Love heart stickers
  • Card
  • Hole punch
  • Split pins
  • Scissors
  • Ribbon
  • Pens
What did we do?
The first thing we had to do was decorate our bottles. For this we chose love heart stickers. Bee showed precision and concentration when placing them onto the sides of the bottle.


We then cut out two love hearts out of card. On the first love heart I wrote the words:
You blow me away!      


On the second heart Bee wrote her name. Depending on your child's age and stage of development they could write their friends name too.
The final thing was to use the hole puncher to create a hole in the top left corner of each heart. A piece of ribbon was then threaded through both hearts to attach it to the bubble bottle... and voila... a cute and home made Valentines gift.


Development outcomes:
Communication and Language- Following instructions
Literacy- Making marks for a reason, practicing writing their name and their friends names. Writing recognizable letters.
Mathematics- Talking about the heart shape. How may sides does it have. Does it have curved lines?
Design and Art- Creating their own gift. Using tools for a purpose.
Knowledge and Understanding- Learning about Valentines Day, what the festival stands for and what it entails.
Personal, Social and Emotional- Making gifts for their friends. Fun and enjoyment. Pride from finished product and working as a team. Cooperation.
Physical Development- Hand eye coordination and fine manipulative skills. Developing threading and cutting skills.

What could be done next?
  • Wrap a note around a pencil and write "you are just 'write' for me!" You could also attach a small note pad.
  • Make a flower out of some tissue paper and a straw. You could even perfume the flower with some essential oils.


Thursday, January 22, 2015

Straw Shapes

Recently my daughter Bee has been getting confused with differentiating squares and rectangles. I was wondering how I could help her with this and after drinking with a straw an idea came to me. Why not make squares and rectangles with straws! 


This activity not only promoted Bee to think of the structure of the shapes, but developed her physical skills as she tried to fit one straw into the other.

Who can play?
Children aged 3 years plus. All activities depend on the child's age and stage of development. 

What do you need?
1. Straws
2. Area to lay out the straw shapes
3. Ruler

What did we do?

Firstly, we talked about what makes a square (4 sides that are equal) and looked around our home at objects that had a square shape. We then looked at objects that were rectangular and compared the similarities and then differences. We talked about the 4 sides of a square and them being equal. Next we discussed how a rectangle also has 4 sides, however two are long and two are short. 

The next thing was to explore the straws and make our square shapes. We measured the straws with a ruler, to encourage maths skills and check all straws were the sane length. We talked about if the straws were smaller we could still make a square, as long as they were all equal in size. 


Once Bee was confident in making squares. We went onto rectangle shapes. Bee developed her problem solving skills when I asked her how could we make two long sides. After a while she came up with the idea of putting two straws together. This was achieved by pinching the end of one straw and slotting it through the end of another. 


This led to an extension activity of experimenting with the straws to make other shapes. 

What did we learn? 
Physical Development: Fine manipulative skills when picking up straws, placing them on the shape and pinching the end to fit into another. 
Mathematical Development:  Counting straws, measuring and using maths language such as short and long. Developing understanding of shapes. 
Expressive arts and design: Creating and designing shapes. Using tools for a purpose. 
Personal, social and emotional: fun and enjoyment. Pride from finished product. Working together to solve a problem. 
Communication and language: Discussing what they are doing and how they can make the shapes. Describing the shapes. Following instructions. 
Literacy: Developing fine manipulative skills that are needed when learning how to write. 
Creative designing and making
Talking about shapes in their environment.

Next steps:
1. Experiment making other shapes with the straws and how to connect them. You could always attach them together with cello tape. 
2. Talk about adding more straws to make shapes bigger.
3. Create shape sticky pictures with glue and straws. 
4. Go for a shape investigation walk in your local environment or in the home.

Wednesday, December 24, 2014

Following Santa on his sleigh.

It's nearly time for Santa to make his yearly trip. If you want to follow him, I found a fantastic website that allows you to track where he is. The website also teaches your child about different countries, therefor developing their knowledge and understanding of cultures and other countries around the world. It is definately worth a look. Happy Christmas!

http://www.noradsanta.org

Sunday, December 7, 2014

Favorite play dough recipe

During my years working with children, I have tried and tested many home made recipes for playdough. I must admit, I do cheat from time to time and buy it from the store, but nothing beats a fresh, warm and sweet smelling batch of dough. This recipe can keep for up to a month (sometimes longer) if stored in an air tight container or zip locked bag.


Who can play?
Children one year plus will love this multi sensory activity.

What do you need?

1 cup Flour
1/2 cup Salt
2 tbsp Cream of tartar
1 cup Water
1 tbsp oil
Bowl 
spoon
Pan
Chopping board 
Optional Food colouring and essence to enhanance play

You can double up on the ingredients for a bigger batch however, I have found that the dough gets stuck onto the pan during the cooking stage. 

What do you need to do?
1. Add all the dry ingredients to the pan.
2. Slowly pour in the wet ingredients whilst stirring. Stir until the ingredients are blended together.
3. Place on the stove (low light) constantly stir the mixture so that it does not stick to the pan.
4. When the mixture comes together and begins to look like dough, take it off the heat and place on a lightly floured chopping board.
5. Kneed the dough until it is just warn and has the texture of play dough.
6. At this stage you can add herbs, food colouring or any essence that is needed. Be careful when adding essence as too much will make the dough go soggy. 
7. If you find the dough becomes a little bit sticky over time, just add more flour.

What can your child learn?
  • communication and language- talking about what they see, smell and feel. Listening to and following instructions.
  • Physical development- Hand eye development. Small and large physical development when pinching, pulling and stretching the dough.
  • Personal, social and emotional- Fun and enjoyment. Spending quality time with you will encourage self esteem and bonding. Playing with the dough can also have a therapeutic and stress relieving effect.
  • Mathematics- Shape and capacity. Counting out ingredients.
  • Understanding of the world- change of state 
  • Literacy- Reading ingredient list 
  • Expressive arts and design- creating models and designs with the dough and equipment.
Follow up activities:
1. Explore the dough with just your hands or with tools and utensils 
2. To develop scissor skills, encourage your child to cut the playdough
3. Make pretend food for a shop/restaurant 
4. Bake in the oven on a low heat for several hours to create ornimants or play food etc.


Monday, December 1, 2014

Surprise Christmas books

There are so many lovely Christmas ideas circulating social media and the Internet at the moment, that there are not enough days in December to cover them all! One idea that I came across on oopseydaisyblog.com (http://www.oopseydaisyblog.com/2011/11/christmas-book-advent.html) They had the idea of wrapping 24 christmas/holiday themed books up for you and your child to read before bedtime, over the holiday period. I loved the idea and decided to make this a Christmas tradition for my family.

                                    
                            Our Christmas tree with the wrapped up books, waiting to be opened.
Who can play?
Children and adults of all ages. It has been proven that even reading to your baby can increase their ability to talk, read and have a greater understanding of language and literacy.
This is also a lovely activity for a school. Each child could bring in their favorite book that has been wrapped up and the teacher could read a few each day.

What do you need?
1. Wrapping paper
2. Cello tape
3. 24 holiday themed books. I used books that Bee already had and a few that I found at the thrift store. During the month of December we also celebrate Hanukkah, so I have added books that feature this festival too.

What do you need to do?
1. Wrap up your chosen 24 books and place them underneath your Christmas tree on the evening of the 30th November but, don't worry if you start it later... Your child will still love this activity whenever you start it.
2. Each night before bedtime ask your child to chose a book to read together.
3. Unwrap the book and enjoy it. Bee loved the excitement of finding out what the book was and especially the surprise of finding a new book.

What could your child learn?
  • Communication and language- talking about the title and what they think the book will be about encourages understanding of books and develops inquisitiveness. Reading together will encourage the development of speaking and listening skills.
  • Physical development- when taking off the wrapping paper and turning the pages of the book, your child will develop their fine and large manipulative skills.
  • Personal, social and emotional- Fun and enjoyment. Spending quality time with you will encourage self esteem and bonding. The children will also love the excitement of unwrapping the book everynight until Christmas and hopefully develop a love of books.
  • Mathematics- counting how many books are underneath the tree and the numbers on the pages of the book. You could also talk about the sizes of the books and their shapes.
  • Understanding of the world- learning about festivals that are celebrated around the world, such as Christmas and Hanukkah. This encourages diversity and knowledge, compassion and understanding of different cultures.
  • Literacy- pointing to the words as you read and talking about the pictures will develop letter recognition.
  • Expressive arts and design- you could also create your own christmas book together.

What could be done next?
1. This activity could become one of your families holiday traditions.
2. You could do the same activity but on halloween or easter.
3. Write the numerals 1 to 24 on the parcels and either ask your child to count down from 24 to 1 or unwrap the numbered gifts according to the date.