Showing posts with label Creative. Show all posts

Tuesday, May 27, 2014

3-D frozen ice castle

Like most 3 year old children, my daughter Bee loves the new Disney movie Frozen. Merchandise from this movie is few and far between, so we have made most of our Frozen themed toys our self.


It started with making a Frozen ice castle out of a cardboard box and a few spare Christmas decorations. Then, when throwing out the packaging from Bee's new bed I saw some polystyrene blocks. They were white and resembled blocks of ice, perfect for an opportunity to develop Bee's creativity, imagination and physical skills, whilst attempting to build her own ice castle.
Bee loved building and knocking down her castle and keeps returning to this activity
The blocks are so open ended, children can rebuild their castles and they can be easily stored . Bee made ice castles, mazes, towers and slides.


What the critique had to say:
"I loved playing it with you and I could build really high towers" Bee aged 3 years 10 months.

Who can play?
The activity is aimed at children aged three years plus, however this depends on their age and stage of development.

Safety:
Ensure that your child is supervised at all times. Polystyrene, if swallowed can swell in the stomach.

Questions to ask:
  • Open ended questions such as what can we build? and how?
  • How tall/small is your castle/tower?
  • Do you think it will be hot/cold to live in an ice castle?

What do you need?

  • Polystyrene blocks 
  • Small world figures. we used Disney Princess', however you can use whatever you have available.
  • Pine cones and silver Christmas decorations.

What did we do?
Before giving Bee the polystyrene blocks, we talked about the importance of not eating the blocks as they can swell in her stomach. Even though I know this is not what she would normally do, for safety reasons I just wanted to make sure she knew. I also gave them a shake as they had been in the garage. where the lovely spiders like to live.
Once they were ready, I placed them on the driveway, ready for her to explore. As soon as she saw them, she instantly said "I can build an ice castle with them!"


Bee showed creativity as she created slides for her Princess' to go down and used her shoes for beds.


It was quite windy outside and Bee began to get frustrated with her castle being blown over, so we took the activity inside.
Bee really unleashed her creativity, she stacked the blocks creating towers. This created a great opportunity for maths development as she used lots of maths language when describing what she was doing "My towers getting bigger", "I'm using this small brick" and "I am putting this on top"


She would also carefully position the blocks, Christmas decorations and Princess', showing hand eye coordination and developing an awareness of space.


The castle changed shape several times throughout the afternoon, as Bee experimented with the design. She played imaginatively with the small world toys and involved me in her play, making up story plots and dialogue. She developed her own thoughts and ideas.


Towards the end of the activity Bee used the polystyrene blocks to create a maze. She said that the Princess' were stuck in there and Buzz light year had to rescue them. I think this was due to a visit to the farm last year, when we struggling to find our way out of the maze maze.


What did we learn?
  • Communication and language- Talking about what she is doing and using speech to convey meaning.
  • Physical development- Fine and large manipulative skills when building and hand eye coordination.
  • Personal, social and emotional- Making relationships, social skills such as sharing and turn taking. Working towards the same goal and fun and enjoyment. 
  • Mathematics- Learning about shapes, space, measurement and sizes, such as small, medium and large. Counting the bricks.
  • Understanding of the world- Possible opportunity to learn about ice.
  • Expressive arts and design- Engaged in role play, designing a castle and using their imagination. Developing resourcefulness and creativity.
What could be done next?

  • Substitute Princess' with cars, balls or any other toy your child is into. They will love rolling them down the ramps, learning about trajectory.
  • Create a Frozen ice castle, by using a cardboard box and other items found from around the home.

Monday, May 12, 2014

Painting with natural materials

Fancy getting creative but do not have any paint??? No problem! Reach into your fridge and cupboards and get creative. Today, we experimented by painting with beetroot, spinach, coffee, tea and curry powder (it was a bit stinky but very effective) This activity uses natural materials, so therefor it is safe for little ones to explore. You do not have to use the items we did, just get creative and raid those cupboards!!
From this to...
...this

Who can play?
Due to the paint being from natural materials, I would recommend this activity for children aged around 8 months and above. Consideration needs to be given to the age and stage of development of the child.With young babies I would just use coloured yogurts, avocados or any other food that your child is being 'weened' on.

Safety:
To make the natural paints, I had to use hot water. I would only recommend an adult do this stage to prevent potential scalding.
The liquid from the vegetables and coffee etc will stain clothing, so I highly recommend covering the table/easel and clothing with an apron.
If younger children are involved, use food that they have already tried and experiment with them on the paper

What do you need?
  • Half a beetroot,  half a cup of spinach, 1 tsp coffee granules, 1 tea bag and half a tsp of curry powder, but you can use anything in your fridge/cupboard that you think will make a coloured liquid
  • Hot water
  • Small containers to hold the home made paints
  • Paintbrushes
  • Paper
  • Apron
  • Newspaper to protect the table/painting easel
What did we do?
The first thing I had to do was make the 'paints'. To do this I placed each of the ingredients in their own container. I boiled some hot water and then poured one teaspoon in each of the containers. We spent a few minutes predicting the colours that each if our natural ingredients were going to make. 
The coffee and curry just needed a stir, but I left the beetroot, teabag and spinach to soak for around 5 minutes. Once I was happy with the colours, I removed them.
The natural paints 
Bee commented on how the natural materials made the hot water change colour. 
We talked about how the 'paint' smelled and which one we preferred. The coffee was her favourite and the curry she said was in her words 'pongy '.
It didn't take Bee long to start creating a natural masterpiece. She enjoyed using different techniques such as using the brush to make lines, swirls and splashed.
                                Experimenting with mark making                                
She held the teabag between her fingers and made marks going both up and down the paper, sometimes squeezing it to make it drip. Bee said it was getting quite messy, so she chose to daub her paintbrush on the top and then onto the paper.

Painting with the teabag
                                   
During this activity, Bee experimented with mixing the coloured liquids together. I introduced words such a light and dark when she had made a darker/lighter colour. 

Mixing colours
Bee enjoyed making her own paints and completely covered her paper. She had lots of fun and enjoyment and couldn't wait to show her Dad what she had been up to.
The final product...looks like a beautiful watercolor painting.
What did we learn?
  • Communication and language-Speaking, listening and talking about the things that they are doing.
  • Physical development- Fine manipulative skills when holding the paint brush and making marks across the paper.
  • Personal, social and emotional- Making relationships, social skills and developing a sense of smell. Fun and enjoyment and pride from finished product
  • Literacy- Mark making on the paper 
  • Mathematics- Shapes, space and  measurement when making marks on the paper.
  • Understanding of the world- Learning that you can make coloured water from food sources.
  • Expressive arts and design- Developing an awareness of colours and being creative with paint.

What could be done next?
  • Paint with mud outside. It is readily available and easy to wash off walls.
  • If you have any left over fruit and vegetables (after lunch/dinner) experiment with them instead of throwing them away.
  • Experiment with dying old clothes with the natural materials.


Tuesday, April 29, 2014

Painting with bouncy balls

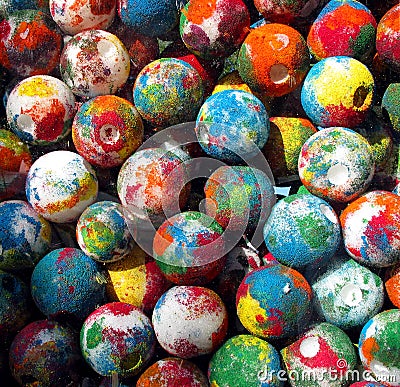
When heading to the park for a play date, Bee wanted to take her bouncy balls to show her friend A. She seems to be really into them at the moment. To extend her learning and follow her interests, I also had the idea to take along some paint and paper and try a bit of bouncy ball painting. The park was the best place for this activity as we had enough space to really bounce the paint covered ball on the paper... and it meant less cleaning up at home, double bonus! 

                                 Painted Balls

Who can play?
This activity is aimed at children aged 3 years and over, however all activities depend on the child's age and stage of development. Younger children can play if the bouncy balls are substituted by larger balls.

What do you need?
  • Bouncy balls
  • Large roll of paper or unwanted wrapping paper
  • Non toxic, waterproof paint
  • Baby wipes to clean up afterwards
  • Bowls to hold the paint and balls
  • Clothing that you do not mind the children getting paint on
  • Bag to place the items used to paint in

Safety:
Small bouncy balls can be swallowed, so ensure children are closely supervised. When carrying this activity out in the park, ensure that you have a good distance between yourself and other visitors, this will ensure that no one gets hit with a stray painted bouncy ball. 

What did we do?

Prep the area, by placing the paper on the ground and paint in bowls. It was a little bit windy on the day we made our painting, so we had to add objects to the corners to keep the paper down. Baby wipes were placed right next to the activity to clean the children once they had finished the activity.

The children were then given a bouncy ball and I talked about how they could dip them in the paint and bounce them on the paper. A enjoyed bouncing hers from a low height and Bee preferred to bounce hers high. Both children found it funny when the ball bounced on and off the paper, making lots of splodges. A said the ball was "making tiny circles on the ground"

Paint covered bouncy balls in action

Bee and her friend enjoyed bouncing the balls to make patterns on the paper. After a while they then dipped the balls in the paint and then used them to print small circles on the paper.
Printing with the bouncy balls
The children seemed to be enjoying painting in the park and decided to take this activity to the next level by removing their shoes and paint with their feet. They enjoyed mixing the colours together with their feet and commented on the change colours, textures and that is was wet. The paint was quite slippy, so the children held onto a mummies hand or each other's to stay up right.
Bee experimenting with foot painting and saying hi to her shadow 
                       
 By the end of the activity, the children looked really mucky, but you could see that they had enjoyed the process of getting in that state!
Paint covered children and Bee's new preferred pose
Bee and her friend practiced their self help skills by helping clear away the paints and attempting to wipe the paint off their bodies.
Painting in the park was a big success. The children were given the experience to paint on a large scale and the bonus for me, was not having to wipe away paint from my walls and floor.

What did we learn?
  • Communication and language-Talking about what they see and feel. Describing textures and what is happening.
  • Physical development- Fine and large manipulative skills when throwing the bouncy ball on the paper and walking through the paint with their feet 
  • Personal, social and emotional- Making relationships, taking turns with the paint. Self help skills and asking others for help when the paint was getting slippy. Fun and enjoyment. Cooperation when creating a piece of art with their friend feelings and self help
  • Literacy- Making marks with the paint
  • Mathematics- Learning about the shapes the ball and their feet make on the paper. Developing an awareness of space and measurement when creating their masterpiece, for example, A bounced her ball low and Bee bounced her ball high. 
  • Understanding of the world- Developing an awareness of change of state, when the children mixed the paints together. Experimenting the effects that the paint covered ball has on the paper, when it bounces on it.
  • Expressive arts and design- Mixing and experimenting with different coloured paints. Creating patterns with the paint, balls and feet
What could be done next?
  • Use larger balls.
  • Roll the balls rather than bounce
  • Try this activity on a smaller scale, by placing paper on a tray and then rolling marbles coated in paint around on it.

Sunday, April 27, 2014

Coffee filter flowers

With Spring in the air and Mother's Day around the corner, we thought we would experiment and try to make some flowers. I remember making flowers whilst working at a Nursery with coffee filters and water colours. I thought I would substitute the water colours with food colouring, since we had these items in our food cupboard. Once we had made our filter paper creations, we added a pipe cleaner to transform it into a pretty flower.


Who can play?
Children aged 3 years plus, depending on the child's age and stage of development.
If younger children are involved you could substitute the food colouring for non toxic, washable watercolours.

Safety:
Protect clothing and tables by using an apron and newspaper. I also placed the activity on a tray, just in case it steeped through the paper. Food colouring can also stain clothing and hands, so I would recommend your child wears clothing that you do not mind getting stained. If the colouring stains hands, try rubbing olive oil and lemon juice on them, to remove.

What do you need?
  • Coffee filters
  • Paintbrush
  • 4 containers to hold the diluted food colouring. I chose egg cups
  • Food colouring. I chose red, blue, yellow and green
  • Water
  • Apron
  • Newspaper
  • Tray
  • Watercolours (if younger children are involved in the activity)

What did we do?
The first thing I did was to protected the area and clothing, by applying newspaper and a tray to the table and asking Bee to put on her apron.
The next thing was to mix the food colouring with water. Bee poured a little bit of water in each egg cup and I added one drop of the food colouring.

                                     
Our next job was to get creative and paint our coffee filter papers. Bee commented on how the paper was making the coloured liquid 'spread out'. I introduced the word 'absorb' at this point and we discussed that the paper was more porous than ordinary paper and therefore readily soaked up the food colouring. She enjoyed applying the liquid and watching the paper soak it up.

                                
Bee enjoyed mixing the colours together on the paper, by using her paint brush. 
Towards the end of the activity, she decided to pour one liquid into the other, mixing the colours in the pots and commenting on their change of state. Bee continued mixing all the colours until the only colour that was left was brown.

                                          
Bee wanted to continue with this activity, so we introduced some watercolour paints. We noticed that the watercolours left a pastel colour and the watercolours were much stronger and brighter.

                                      
Once they were dry, she held one up to the window. It looked so pretty when the light passed through it, so I taped a few up to the window, as a sun catcher. When her Dad came home from work, she could not wait to show him. 


With the remaining painted filter papers, we pinched them in at the centre and attached a pipe cleaner to them, so that it looked like a pretty flower. I found some vanilla essence in the cupboard, so we sprinkled a drop on each flower, to make it smell nice. You could also use any other essence available or perfume.


What did we learn?
  • Communication and language-Discussing the effects and changes she is seeing. Talking about what she is doing.
  • Physical development- Fine manipulative skills when holding and painting with the paintbrush and developing coordination.
  • Personal, social and emotional- Fun and enjoyment. Pride from finished product. 
  • Literacy-Developing a tripod grip when holding the paintbrush (building the muscles to hold a pencil)
  • Mathematics- Learning about capacity when pouring and filling the egg cups with the food colouring.
  • Understanding of the world- Learning about change of state when mixing the colours.
  • Expressive arts and design- Being creative and experimenting with colours and colour recognition. Learning through sense of smell, touch and what she can see.
What could be done next?
  • Gather a bunch of the flowers together and put either in a vase or give as a Mother's Day gift
  • Play flower shop
  • Guess the smell of the flowers, add perfume, essence and possibly spices 
  • If you do not have coffee filters at hand, why not try kitchen roll. It is just as absorbent.


Thursday, March 13, 2014

Rainbow pens

After seeing so many rainbow crafts on the internet, the idea came to me to attach felts tips together that were the colours of the rainbow. Bee loved this idea and enjoyed making rainbow patterns on her paper.

Product of the rainbow pens
                                     

Who can play?
Children aged 2 years plus. Depending on their age and stage of development

Safety:
Chose non toxic, washable pens.

What do you need?
  • Red, yellow, pink, green, orange, purple and blue felt tips
  • Cello-tape
  • Paper

What did we do?
Firstly we had to attach the felt tips together with the cello-tape. This proved a little bit tricky for Bee, but with a bit of assistance we managed it. We ordered the felts in the order of the rainbow song:

Red and yellow and pink and green.
Orange and purple and blue.
I can sing a rainbow, sing a rainbow, sing a rainbow too.

Felt tip pens attached together in the order of the rainbow colours... excuse the pink and blue pens...they were the only ones I could find :-)

Bee, held onto the pens and dragged them across the paper, from one side to the other. At first the paper would move, so she asked me too hold it still whilst she moved the pens. When she reached the other side, she looked so pleased with herself and said "look mum, I made a rainbow!"

Bee starting her rainbow picture with the rainbow pens...
...and finishing it at the other side of the paper.
She was really happy with the finished product. She also sorted all the lids, so that they matched the corresponding pen.

Her rainbow picture

This activity encouraged Bee to draw her own rainbow later that day.
Drawing rainbows free style
 I also designed this rainbow to encourage Bee to develop not only her colour recognition, but pencil control too. She has not used it yet, but I place it in her writing area, for when she is ready.
Pencil control rainbow
What did we learn?
  • Communication and language- Talking about the colours that she sees. Recalling personal experiences of rainbows.
  • Physical development- Fine and large manipulative skills, hand-eye coordination.
  • Personal, social and emotional- Asking for help when needed. Feeling pride from finished product.
  • Literacy- Drawing from left to right, therefor developing the skills used for writing.
  • Mathematics- Trying to space out the lines on the rainbow, so that they do not touch. Matching the correct coloured lids to the pens.
  • Expressive arts and design- Creating rainbows with felt tip pens and attaching them all together to make a rainbow. Learning about colours.

What could be done next?

  • rainbows with pasta, play dough and beads
  • Making rainbows with primary coloured paint.
  • Provide pictures to the drawing/writing area for inspiration
  • Make rainbows outside with the hose pipe or water sprays.


Sunday, March 9, 2014

Making rainbows with pasta, pony beads and play dough

After a heavy down pour over the weekend, it was so lovely to see a beautiful rainbow. It was my daughters first ever rainbow and she was so interested in it. We talked about why rainbows happen for example sunlight passes through the raindrops and this causes it to separate the sun light into its individual colours. For more information about why rainbows, eo.ucar.edu has more details.


The next day, I saw happyhooligans.ca  activity, using dried spaghetti, pony beads and play dough. I knew Bee would love this as it was following her interest and would build on her experience of seeing the rainbow the other day. Thank you happyhooligans.ca for your idea and inspiration.

Who can play?
Children 3 years and above, depending on their age and stage of development.

Safety:
Small beads can easily be stuffed up noses or swallowed, so supervision is required at all times.

What do we need:

  • Three tubs to contain the items needed for this activity
  • Dried spaghetti at different lengths
  • Rainbow coloured pony beads
  • Green play dough
  • Rainbow template
What did we do?
Firstly I set up the activity and left it on the table before lunchtime. Sometimes I find this a good idea to do this, as it can keep them occupied as you 'try' to make a meal (if they are not involved in making it with you)
I wanted to see what she would do with the equipment without direction.


When she saw the activity she went straight for the play dough, manipulating it with her fingers and pushing it onto the table. 
Picking up a piece of dried spaghetti, she poked holes in the dough.

                                  
 "Look Mummy" she said "I have made a face, with hair, cheeks, eyes and a nose" She said it was her little cousin.


Next she popped a piece of spaghetti in the middle of the dough and said it was a lollipop. Bee made one for me too and as we pretended to eat them, mine snapped "never mind" she said" I will have a small one too" and snapped hers in two, so it was the same size as mine.
We played with the dough and the spaghetti for a while and Bee made some models, by pushing lots of spaghetti into the dough. Bee said her model was a mouse.


Bee then spotted the beads and began to thread them carefully onto the spaghetti, saying "better be careful not to poke myself up the nose" She showed a lot of concentration and would count the beads as she would post them on.


Next, so began pushing the beads into the dough, making patterns. Then we played hide and seek with the beads in the dough.


I was surprised when Bee decided to put a piece of spaghetti in the bowl of beads and pick one of them up. "I'm fishing" she said "wanna play it with me?" How could I refuse?! She would carefully place her spaghetti into the centre of the pony bead and tilt it back, making the beads go down to the end.


Towards the end, Bee looked at the rainbow template. She talked about the colours and said that she could match the beads to the correct colours.

                                   
 We sang the rainbow song:

Red and yellow and pink and green.
Orange and purple and blue.
I can sing a rainbow, sing a rainbow,
Sing a rainbow too.
The also said the rainbow poem:

Richard of York, gave battle in vain.

When tidying the activity away, Bee spent a few minutes snapping the spaghetti into little pieces. She commented on them getting smaller the more she snapped them.
This activity lasted quite a while and Bee showed a lot of interest and concentration. 
What started off as what I thought was a rainbow threading activity, turned into so much more. Just goes to show if you allow children to play and experiment they will use their creativity and explore.

What did we learn?
Mathematics- Counting pony beads. Learning about long and short when breaking up the spaghetti
Communication and language- Discussing what they are doing.
Personal, social and emotional- Searching for someone to share their experiences with. Fun and enjoyment.
Physical- Fine manipulative, such as pushing, pinching and manipulating the dough. Developing hand eye coordination when placing the pony beads onto the spaghetti.
Understanding of the world- Talking about members of her family.
Literacy- Developing the skills to hold a pencil when picking up the small beads in a tripod grip.
Expressive arts and design- Designing her own pattern with the pony beads. Making models and creating faces. Singing the Rainbow song. Making up her own games.

What could we do next?
  • Make rainbows out of play dough
  • Thread beads onto pipe cleaners if your child gets a bit frustrated with the spaghetti breaking
  • You could also add a different variety of threading tools to this activity, such as wool, sticks etc.

Monday, January 27, 2014

Cardboard Ice Castle

Have you been hooked on the new Disney movie Frozen? Well, I know my little 'Princess' has.
For Christmas, Isabella received some small world characters from the movie and we decided that they needed a home. Buying a brand new Frozen ice castle was not an option. So we thought we would make one ourselves. Together with a few cardboard boxes, kitchen rolls, paint, glue and glitter we were able to make a beautiful castle, that Isabella felt proud of.
This project lasted a few days, but your child will love it forever (or until the cardboard gives in)


What you need;
Aprons
Scissors (for adult)
Table to make the castle on
A cardboard box
Light blue paint (blue and white mixed together)
Blue paint for turrets
Paintbrushes and paint pots
Glue
Glitter
Material scraps
Tin foil
Newspaper
Cello tape 
Four kitchen rolls
6 1/2 empty variety pack boxes
Empty cracker box
Scrap pieces of material
A clock cut out of a home magazine 
Crystal bobble for the lights or anything else that could resemble a ceiling light
Elsa and Anna toys, however any princess or small role play figures could be used.

What we did

To ensure that the table was protected, I placed newspaper on the top and secured it with cello tape. Isabella and I also used our aprons to protect our clothes from paint and glue.
       

We had an empty box in our craft cupboard, that was destined for better things. Boxes are amazing, they are an open ended resource and can be transformed into almost anything. This box will be transformed into Elsa's Ice Castle (From the movie Frozen)

         
The first thing that had to be done was to cut off the top flap. This was then used as the second floor. To keep this in place, I added two variety pack boxes at each side to rest the floor on. To secure this in place I added cello tape. At this stage I also cut out a door and a window.
         

How can our Princesses reach the bedroom on the upper level??? We had to make some stairs. We used an empty cracker box and did them in three steps.
Step one was to cut off the top section and the side...


The second step was to place the side into the box 


The third step was to make the steps. I used a strip of cardboard and made it into a consertiner. It did not feel very sturdy, so I added kitchen rolls, cut to size underneath and used cello tape again to secure in place.


Isabella then positioned some kitchen rolls on the top of the roof to use as turrets.


When she had positioned all the turrets, we yet again secured them with more cello tape.
Next was the fun part... To paint it. Isabella said that she would like to paint it blue, as that was "a cold colour". We mixed blue and white together, to make light blue. As you can see by her face, this is the bit she was looking forward to.


To add to the 'cold' feeling of the castle, we made some icicle shapes out of glue and sprinkled on some glitter. We glued some tin foil to the steps to make them look icy.


We cut out a clock from a magazine and glued it to the wall, so that the Princess' will not be late for a ball or date with a Prince.
Isabella had an old bobble that had two sets of crystals on it. I cut the crystals off, along with a section of the elastic band. Using cello tape, I attached one to the ceiling of the bottom floor and one to the upper. They actually looked like Elsa's ice lights.
To create the table on the lower floor, I cut a variety pack in half and draped a piece of glittery fabric over it. You could also cover it in tin foil.
In my scrap fabric box, I found some white fury material, that worked perfectly for a carpet on the upper floor.
Hopefully Isabella will enjoy playing with this castle for a long time.